


Afgelopen weekend heb ik mijn kat Boefje verkozen tot mijn black-and-white muse. Ze heeft mij geïnspireer om deze awesome tas te maken. En hier is een korte tutorial zodat je het zelf kan doen. Neem je hond, goudvis of misschien zelfs je cavia als muze en let's start!


Dit heb je nodig: vlieseline, band, stevige (zwarte) stof, een leuk lapje stof voor de applicatie, schaar, potlood, draad (ik gebruikte zwarte en knalblauwe), spelden, naaimachine.
This is what you need: fusible interfacing, band, thick (black) fabric, a nice piece of fabric for the application, scissors, pencil, thread (I used black and blue), pins, sewing machine.

1. Teken een vorm op papier en knip het uit. Ik koos een kat omdat Boefje mijn
black-and-white muse is (:
1. Draw a shape and cut it out. I've chosen a cat 'cause Boefje is my
black-and-white muse (:
black-and-white muse is (:
1. Draw a shape and cut it out. I've chosen a cat 'cause Boefje is my
black-and-white muse (:

2. Teken de kat op een gaaf stofje. Ik wilde graag in de black-and-white sfeer blijven, dus heb ik gekozen voor een stoer bijpassend gestreept stofje.
Iets dat je niet op deze foto ziet is dat ik vlieseline op de achterkant heb geplakt. Dit is wel belangrijk, want dan wordt de applicatie een stuk steviger.
2. Draw the cat on a small fabric. I wanted to stay with the black-and-white sfere, so I've chosen a tough matching striped fabric.
Something you cannot see in this picture is that I ironed fusible interfacing under the application. This is very important 'cause it makes the application a lot firmer.

3. Knip de kat uit.
3. Cut out the cat.
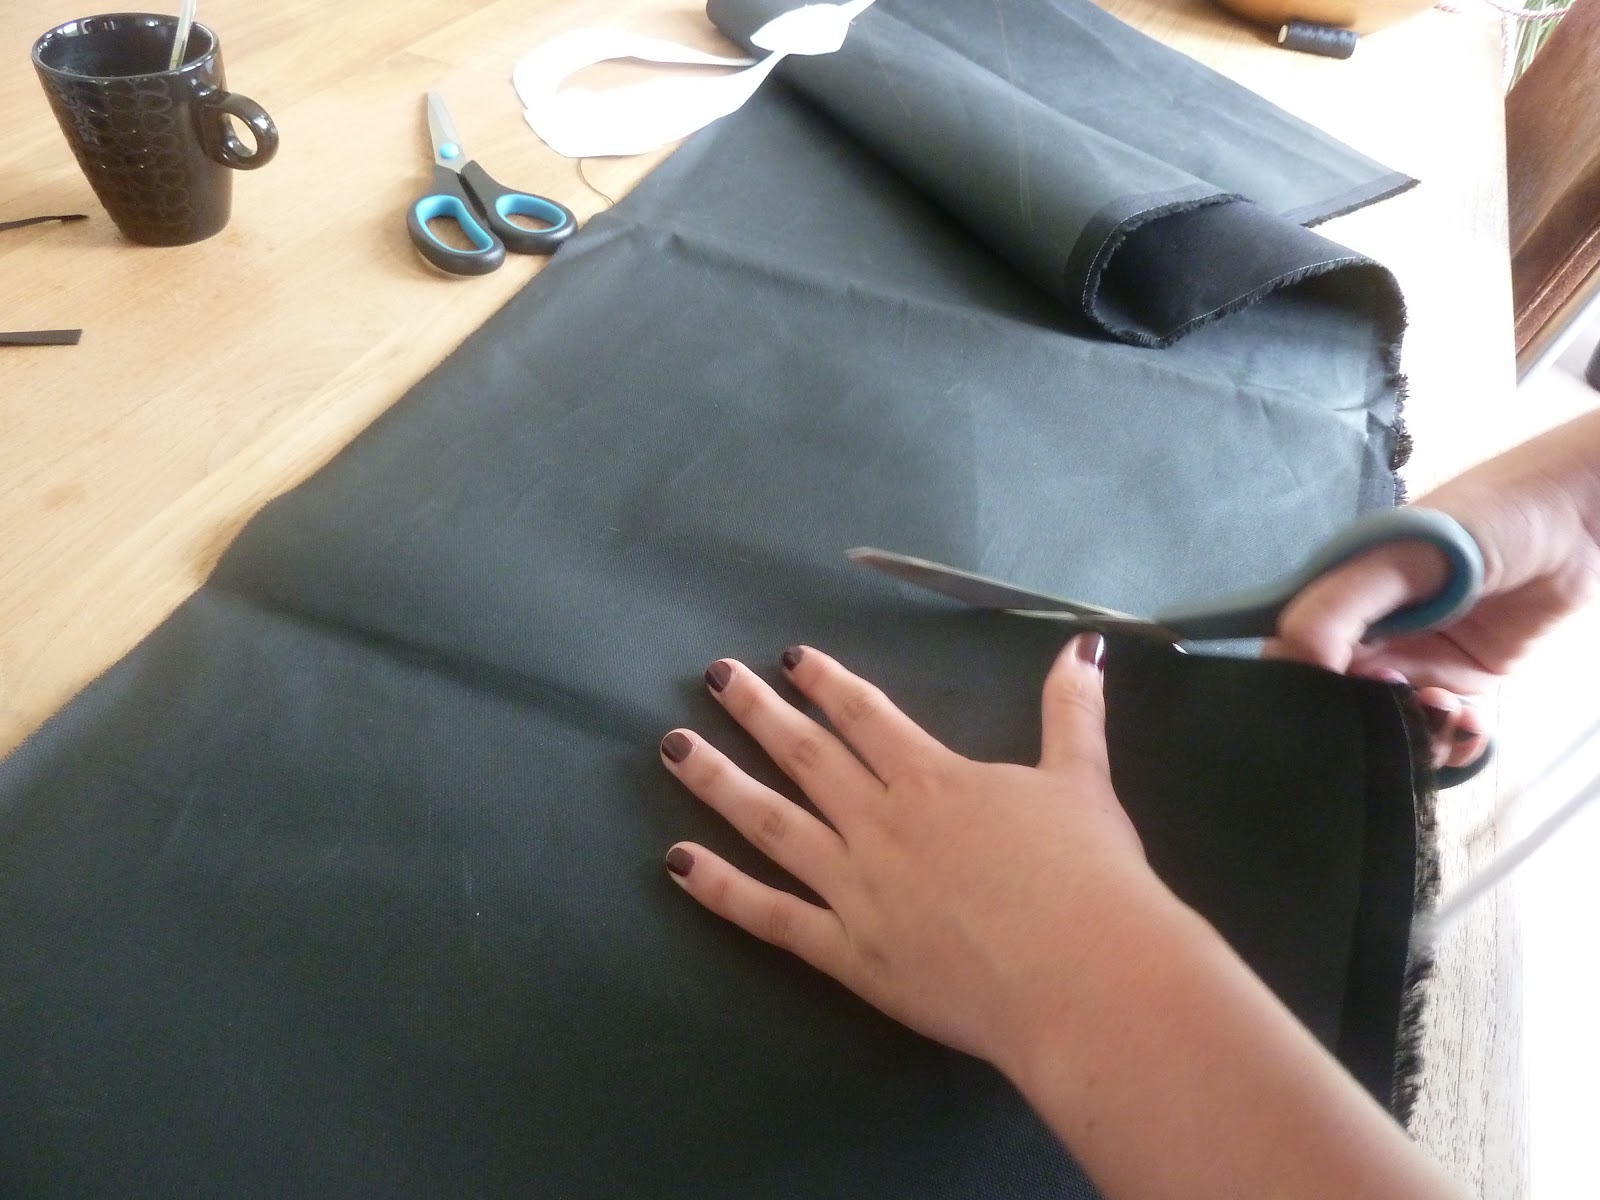
4. Nu is het tijd voor de tas. Knip grote lappen stof uit. Dit moet stevige stof zijn. Ik ben helemaal weg van het stofje dat ik heb gekozen. Het is een soort geplastificeerd katoen. Van de binnenkant lijkt het net pvc. Echt awesome.
4. Now it's time for the bag. Cut big pieces of fabric. This should be from a firm fabric. I'm totally in love with the one I used. It's some sort of a plastified coton. From the inside it looks like pvc. Really awesome.

5. Plak de kat op de stof met textiellijm.
5. Glue the cat to the fabric with textile glue.
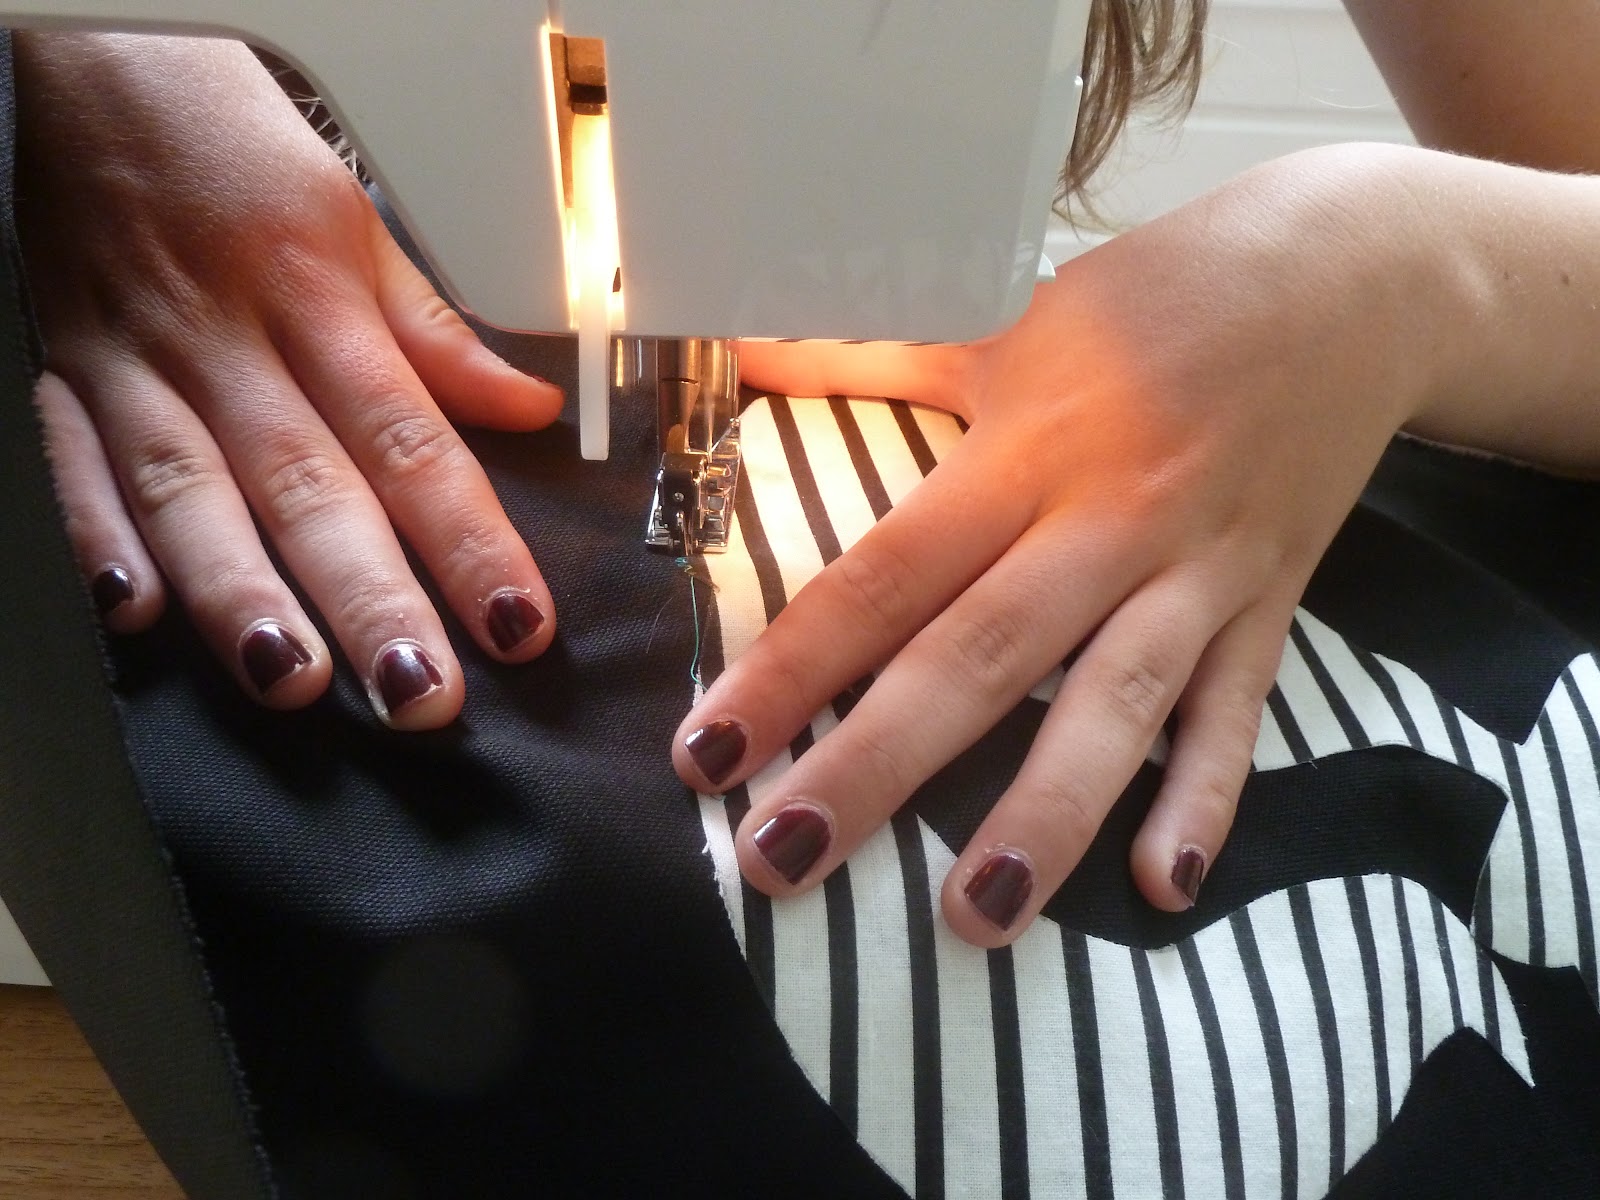
6. Het leuke gedeelte: stik the kat op de tas (oke, dat klinkt een beetje vreemd in het Nederlands x). Iedere keer dat ik de naaimachine gebruik, word ik daar echt heel blij van (:
6. The fun part: stitch the cat to the bag. I really like to do this. Using the sewing machine gives me a happy feeling (:

Het ziet er dan zo uit (:
Then it looks like this (:
Then it looks like this (:

7. Maak een omslag aan beide kanten van de stof, je slaat de stof immers straks dubbel. Bij mijn tas zie je dus nu ook de pvc-achtige binnenkant. Gooosh, echt heel vet!
7. Make a hem. I hope this is the right word, but you get the idea, don't you? Anyway, now you can see the pvc-ish inside also outside. Gooosh, I like it!

8. Natuurlijk komen er ook hengsels aan de tas. Ik vond het vet om deze aan de buitenkant af te stikken, zodat je drie verschillende texturen bij elkaar ziet.
9. Of course your bag should have handles. I liked to stitch them on the ouside. So now you see three different textures, really cool.

9. Nu ziet de 'tas' er zo uit. Eigenlijk is het alleen nog maar een lap stof. De zijkanten zijn nog niet aan elkaar genaaid. Duuus... doe dat xd.
9. So, now the 'bag' looks like this. To be honest, now it's only a piece of fabric 'cause the sides still aren't stitched together. So do that xd.
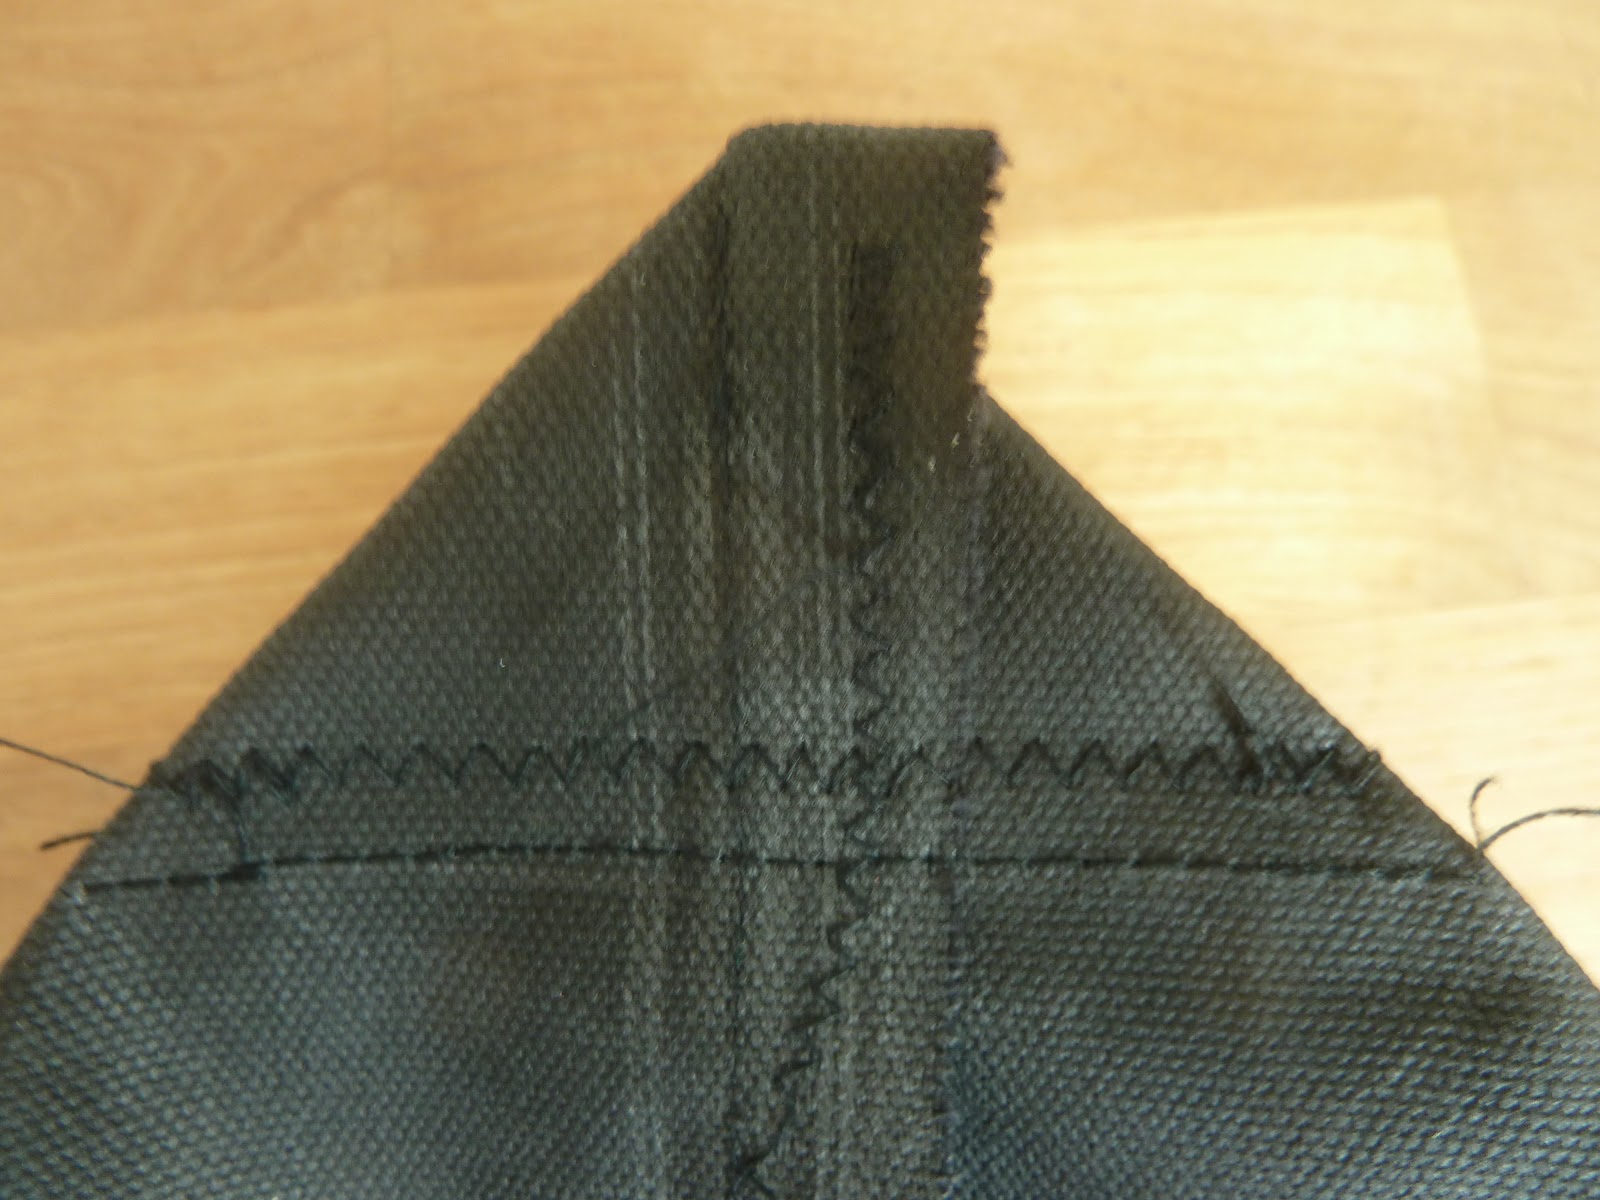
10. Daarna ga je vorm maken in de onderkant van de tas. Dit doe je door een driehoek te vouwen en deze met een zig zag steek een een rechte steek vast te stikken. Dit ziet er misschien moeilijk uit, maar dat is het absoluut niet.
Dit is de binnenkant, zo keer de tas weer goed om, anders ziet het er ook zo raar uit xd.
10. Then it's time to give the bag some form on the bottom. Do this by folding a triangle and stitch it with a zig zag stitch and a straight stitch. Maybe it looks difficult, but it certainly isn't.
This is the outside, so turn the bag right again. Otherwise, it will look a bit strange xd.
Padapapapaaadaaaaa...


Do you like it??
I really think you should try it yourself!
Hi Janna! Great job on the tote bag. Super cute.
BeantwoordenVerwijderenxx Love & Aloha
Come follow me...
http://elisharon.blogspot.com
SO CUTE!!! I wish I had the patience for such fabulous DIY projects!
BeantwoordenVerwijderenahh, thank you for the tutorial!! <3
BeantwoordenVerwijderenxoxo
http://sony-ann.blogspot.com/
thanks for the comment! of course. following you on bloglovin, hope you do the same. love <3
BeantwoordenVerwijderenThank you. Great bag and DIY. I'm sure Boefje likes it as well :)
BeantwoordenVerwijderenxx
Vicky | golden mirrors
Love the bag! This is one amazing DIY! Love cats!
BeantwoordenVerwijderenRebecca
www.winnipegstyle.ca
wooow u r so talented!
BeantwoordenVerwijderenI just love it so much!
<3 Una
That's so cute! Bet it wouldn't work that well if i tried it though! Your cat is definitely a good inspiration :)
BeantwoordenVerwijderenAw, so cute! You're so talented, and I'd love to try this someday. Too bad I don't own a sewing machine just yet. But perhaps soon (:
BeantwoordenVerwijderenCheers,
Catherine
http://grandpa-sweaters.blogspot.com
I really like it, its so cute!
BeantwoordenVerwijderenHi if you have time can you please check out ma blog? xxxxxxxx
emma-christensenn.blogspot.com/
The bag is very nice! good job!
BeantwoordenVerwijderenNice job dear :) and I love your floral jacket!
BeantwoordenVerwijderenxx Ilka
http://ilkavontorok.blogspot.ro/
I really like youR diy ist so cute!
BeantwoordenVerwijderenSo Cute! love this DIY! xxxx
BeantwoordenVerwijderenwww.haemeandrobecca.blogspot.com
Wat een super leuke tas!! Vind je jasje trouwens ook erg gaaf :) x
BeantwoordenVerwijderen